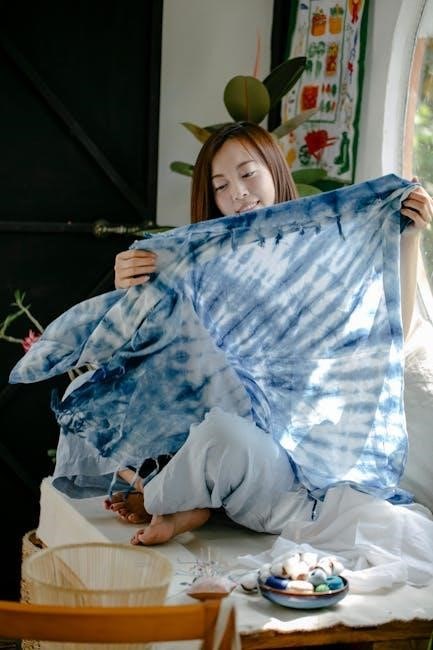
Welcome to the world of creative fabric design with Tulip tie-dye! This guide offers step-by-step instructions for achieving vibrant, professional results with Tulip One-Step Tie-Dye Kits․
Perfect for beginners and crafters alike, these instructions will help you unlock your creativity and produce unique, washable designs with ease․ Let’s get started!
Overview of Tie-Dye Tulip Process
The Tulip tie-dye process involves prepping fabric, binding it with rubber bands, and applying dye to create unique patterns․ Start by washing and drying fabric, then fold and secure it․ Mix Tulip One-Step Dyes as instructed, apply to the fabric, and let it set for 6-8 hours․ Rinse gently and wash separately to preserve colors․ This method ensures vibrant, long-lasting results with minimal effort!
Importance of Following Instructions
Adhering to Tulip tie-dye instructions ensures bright, washable colors and professional results․ Skipping steps or deviating from guidelines can lead to faded or uneven dye distribution․ Proper preparation, accurate dye mixing, and sufficient setting time are crucial for optimal outcomes․ Follow the steps carefully to achieve the desired vibrant and long-lasting designs with your Tulip tie-dye project․
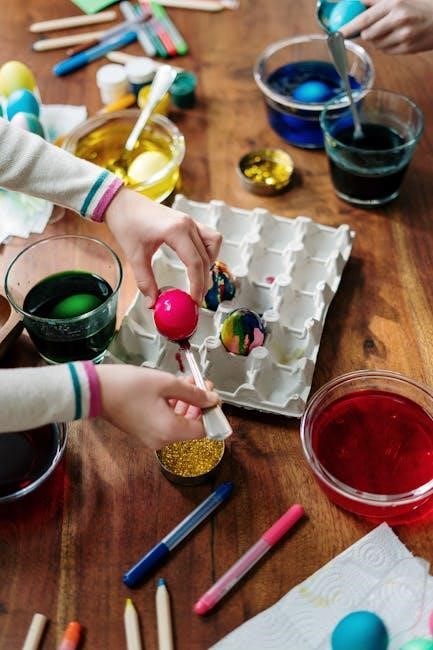
Materials Needed for Tie-Dye Tulip
Gather essential supplies, including Tulip One-Step Tie-Dye Kits, containing dye bottles, rubber bands, and instructions․ Additional items like gloves, plastic bags, buckets, and protective gear are recommended for optimal results․
Tulip One-Step Tie-Dye Kit Components
The Tulip One-Step Tie-Dye Kit includes pre-measured dye bottles, rubber bands, and an instruction booklet with various folding techniques․ Each dye bottle contains powder and a fill line for water, making mixing easy․ The kit is designed to provide everything needed for a successful project, ensuring vibrant, washable colors for fabric creations․ Perfect for beginners and experienced crafters alike, it simplifies the tie-dye process․
Additional Supplies (Rubber Bands, Gloves, etc․)
Beyond the kit, you’ll need additional supplies like rubber bands for binding, gloves to protect hands, and plastic bags or wrap to prevent dye transfer․ Optional items include paint stirrers for mixing and Synthrapol detergent for pre-washing fabric․ These tools enhance the tie-dye experience, ensuring better results and a cleaner workspace․ Gather them before starting your project for a smooth process․
Preparation Steps for Tie-Dye Tulip
Preparation is key to successful tie-dye․ Start by pre-washing fabric to remove finishes and ensure dye absorption․ Use Synthrapol detergent for optimal results․ Choose between wet or dry techniques based on your design preference, ensuring fabric is ready for binding and dye application․ Proper preparation sets the foundation for vibrant, long-lasting colors․
Pre-Washing Fabric
Pre-washing fabric is crucial for successful tie-dye․ Wash the fabric in hot water with a mild detergent, like Synthrapol, to remove any finishes or residues that might interfere with dye absorption․ This step ensures even dye distribution and vibrant colors․ Avoid using fabric softeners, as they can hinder the dye process․ Proper pre-washing is essential for achieving professional-looking results with Tulip One-Step Tie-Dye Kits․
Drying Fabric for Wet or Dry Techniques
Drying fabric is a key step in tie-dye preparation․ For wet techniques, use fabric directly from the washer for optimal dye absorption․ Dry techniques require fabric to be completely dry to prevent excess moisture from diluting the dye․ Proper drying ensures vibrant colors and desired patterns, helping achieve professional-looking results with Tulip One-Step Tie-Dye Kits․
Binding Techniques for Tie-Dye Tulip
Binding fabric with rubber bands is essential for creating unique patterns․ Tighter folds and bands result in distinct, vibrant designs during the dyeing process․
Choosing the Desired Folding Technique
Selecting the right folding technique is crucial for achieving your desired tie-dye pattern․ Popular methods include the swirl, bullseye, and accordion folds․ Each technique creates distinct designs, from spirals to concentric circles․ Experiment with different folds to explore unique visual effects․ Proper folding ensures even dye distribution and professional-looking results․ Choose your technique wisely to bring your creative vision to life․
Securing Fabric with Rubber Bands
Rubber bands are essential for creating resistance areas in tie-dye․ Tighten them firmly around folded fabric to form distinct patterns․ Ensure bands are evenly spaced and not overly tight to avoid discomfort․ The number of bands depends on the design complexity․ Proper securing ensures vibrant, well-defined colors․ Experiment with different band placements to achieve unique effects while maintaining fabric comfort and design integrity․
Mixing Tulip One-Step Dyes
Remove the nozzle and add tap water to the fill line on each Tulip One-Step Dye bottle․ Mix thoroughly for vibrant, consistent colors․ Follow instructions precisely to ensure proper dye concentration and optimal results․ Mixing just before application ensures freshness and bold color payoff․ Always mix in a well-ventilated area․
Following Packaging Instructions
Always adhere to the instructions provided with your Tulip One-Step Tie-Dye Kit․ Each dye bottle contains powder and a fill line for water․ Remove the nozzle, add water to the line, and shake well․ This ensures the perfect mix for vibrant colors․ Follow the recommended ratios to avoid over-saturation․ Proper mixing is crucial for even absorption and long-lasting results․ Refer to the included guide for specific details on each step․
Adding Water to Dye Bottles
Apply Tulip One-Step Dye directly to crumpled fabric using wet or dry methods․ For vibrant results, use single or multiple colors as desired․ Follow package instructions closely․
Wet vs․ Dry Application Methods
For wet application, use fabric directly from the washer․ This method allows dye to absorb evenly, creating softer, blended patterns․ For dry application, pre-dry fabric first․ Dry methods enable precise color placement and sharper designs․ Choose based on desired effects․ Both methods work well with Tulip One-Step Dyes when instructions are followed carefully․
Applying Single or Multiple Colors
Apply a single color for a minimalist look or mix multiple colors for vibrant patterns․ When using multiple colors, apply each dye to separate sections of the fabric, ensuring no overlap․ For layered effects, apply colors in sequence, allowing each to absorb before adding the next․ Follow packaging instructions for mixing and applying Tulip One-Step Dyes to achieve desired results․

Setting the Dye
Allow the dye to set for 6-8 hours to ensure proper absorption and vibrant colors․ Longer setting times enhance color intensity and professional results․
Recommended Waiting Time (6-8 Hours)
Allowing the dye to set for 6-8 hours is crucial for optimal results․ This timeframe ensures dye fully absorbs into fabric, resulting in vibrant, long-lasting colors․ Longer wait times enhance intensity, especially for darker shades, while shorter waits may lead to faded patterns․ Patience guarantees professional-looking tie-dye projects with Tulip One-Step Dyes․
Ensuring Proper Absorption
Proper absorption is key for vibrant colors․ Keep fabric folded and secure during the setting time to allow dye to penetrate evenly․ Avoid unfolding too early, as this can disrupt absorption․ Ensure fabric stays damp but not soaking wet․ Even absorption guarantees consistent, bright results with Tulip One-Step Dyes․
Rinsing and Washing
Rinse gently with cold water to remove excess dye․ Wash separately in cold water with mild detergent to preserve color vibrancy and prevent bleeding․
Precautions for Rinsing
Use cold water to gently rinse off excess dye without scrubbing․ Avoid hot water, as it may cause colors to bleed or fade․ Do not wring or twist the fabric excessively, as this can damage fibers․ Wash separately from other clothes initially to prevent dye transfer․ Always use mild detergent and cold water for subsequent washes to maintain color vibrancy and fabric integrity․
Washing Instructions Post-Dyeing
After rinsing, wash your tie-dye project separately in cold water using a mild detergent․ Avoid using bleach or harsh chemicals, as they can damage the fabric or fade colors․ Gently agitate the fabric if necessary, but do not soak for extended periods․ Air-drying is recommended to preserve color intensity and prevent shrinkage․ For machine washing, use a gentle cycle and cold water to maintain the integrity of your design․

Tips for Achieving Bright Colors
To achieve vibrant colors, follow instructions precisely, use the recommended dye quantity, and allow proper setting time․ Pre-wash fabric to ensure optimal dye absorption and brightness․
Adhering to Tulip One-Step Tie-Dye Kit instructions is crucial for achieving desired results․ Proper dye mixing, application, and setting times ensure vibrant, long-lasting colors․ Deviating from guidelines can lead to faded or uneven patterns, as mentioned in user reviews․ Following steps carefully helps maintain color intensity and fabric quality, making your project stand out and last longer․
Monitoring Dye Quantity
Using the right amount of Tulip One-Step Dye is essential for achieving bright, washable colors․ Applying too much dye can cause over-saturation, leading to faded results over time, as noted in user reviews․ Ensure each color is applied evenly and sparingly, following the kit’s guidelines, to maintain color vibrancy and prevent excessive dye buildup on the fabric․
Common Mistakes to Avoid
Avoid not allowing enough setting time and overloading fabric with too much dye, as these errors can lead to poor color absorption and faded results․
Not Allowing Enough Setting Time
Insufficient setting time is a common mistake that can result in faded colors and uneven dye distribution․ Allowing the dye to sit for 6-8 hours ensures proper absorption and vibrant results․ Rushing this step may lead to disappointing outcomes, so patience is key for achieving the best color retention and durability․
Overloading with Too Much Dye
Using excessive dye can overwhelm the fabric, leading to uneven color distribution and potential fading․ Following the recommended quantity ensures vibrant, long-lasting results․ Overloading may also cause colors to bleed or mix unpredictably, ruining the desired pattern․ Stick to the guidelines for optimal outcomes and to maintain the integrity of your tie-dye design․
Variations in Tie-Dye Techniques
Explore diverse folding methods like swirl, sunburst, or bullseye for unique patterns․ Experiment with single or multiple colors to create vibrant, one-of-a-kind designs․ Let your creativity shine!
Exploring Different Folding Methods
Folding techniques are key to creating unique tie-dye patterns․ Try the swirl method by twisting fabric, or the bullseye by folding into concentric circles․ For a modern look, use the accordion fold․ Each method results in distinct, eye-catching designs․ Experiment with different folds to discover your favorite styles and make each project truly one-of-a-kind․ Creativity has no limits in tie-dye!
Using Multiple Colors for Unique Patterns
Combine Tulip One-Step Dyes in various ways to create intricate, multi-colored designs․ Apply dyes side by side or layer them for a marbled effect․ Using contrasting colors can enhance pattern visibility, while similar hues blend softly․ Experiment with color placement and folding techniques to achieve one-of-a-kind results․ This approach allows for endless creativity and personalized fabric art․ Let your imagination guide your color choices!
Care and Maintenance
Proper care ensures vibrant colors last․ Wash tie-dye projects gently with cold water and mild detergent․ Avoid hot water and harsh chemicals to maintain color brightness and fabric integrity․
Washing Tie-Dye Projects
To preserve vibrant colors, wash tie-dye projects inside out using cold water and mild detergent․ Avoid hot water and harsh chemicals, as they can fade colors․ For best results, hand wash gently or use a delicate cycle․ Allow the fabric to sit for 24 hours after dyeing before washing to ensure colors fully set and maintain their intensity over time․
Maintaining Color Vibrancy
To keep your tie-dye colors bright, wash projects inside out using cold water and mild detergent․ Avoid direct sunlight, as it can cause fading․ For machine washing, use a delicate cycle․ Harsh chemicals or hot water can dull colors, so opt for gentle care․ Following these steps ensures your vibrant designs last longer and retain their intensity over time․
With these simple steps, you’ve successfully created your own tie-dye masterpiece! Embrace creativity and experiment with new techniques for unique results․ Happy crafting!
Final Thoughts on Tie-Dye Tulip
Tie-dye with Tulip One-Step Dyes is a fun and creative process that yields stunning results․ By following the instructions and experimenting with techniques, you can achieve vibrant, unique designs․ Patience is key, as proper dye setting ensures long-lasting colors․ Whether you’re a beginner or an experienced crafter, Tulip tie-dye offers endless possibilities for self-expression and DIY projects․ Enjoy the journey of creating something truly personalized!
Remember, the success of your project lies in attention to detail and adhering to the guidelines․ With practice, you’ll master the art of tie-dye and unlock a world of colorful creativity․ Happy crafting!
Encouragement to Experiment
Don’t be afraid to explore and try new techniques with Tulip tie-dye․ Experimenting with different folding methods, color combinations, and application styles can lead to unique and exciting results․ Remember, tie-dye is all about creativity, so embrace the process and enjoy the journey of transforming fabric into vibrant, one-of-a-kind pieces․ Happy crafting and let your imagination shine!
Additional Resources
Explore online guides, video tutorials, and manufacturer PDFs for detailed tie-dye techniques․ These resources offer step-by-step instructions and tips to enhance your Tulip tie-dye experience․
Online Guides and Tutorials
Discover a wealth of online resources, including YouTube tutorials and Skillshare workshops, offering detailed tie-dye techniques․ Explore playlists dedicated to Tulip tie-dye, featuring step-by-step guides for folding methods like Itajime and Shibori․ Manufacturer websites provide PDF guides and video demonstrations, ensuring you master vibrant, professional results․ These resources are perfect for both beginners and experienced crafters looking to refine their skills and explore new creative possibilities․
Manufacturer Support and PDF Guides
Tulip provides comprehensive support through downloadable PDF guides on their official website․ These detailed manuals include step-by-step instructions, safety precautions, and troubleshooting tips․ Additionally, Tulip offers customer support via email and phone for any queries․ The guides cover topics like fabric preparation, dye mixing, and application techniques, ensuring optimal results․ Refer to these resources for a seamless tie-dye experience with vibrant, long-lasting colors․